Upgrading your deadbolt to a smart lock can improve your home’s security and make daily life easier. Smart locks let you lock and unlock doors using apps, keypads, or even voice commands, eliminating the need for physical keys. They also provide features like real-time notifications, remote access, and temporary access codes for guests.
Here’s a quick overview of the process:
- Check Compatibility: Ensure your door’s dimensions and current deadbolt align with the smart lock you choose.
- Choose a Smart Lock Type: Opt for retrofit kits if you want to keep your existing deadbolt or full replacements for added features like keypads or fingerprint scanners.
- Gather Tools: Basic tools like a Phillips screwdriver and tape measure are usually enough, but some setups may need a drill or installation kit.
- Remove the Old Deadbolt: Carefully disassemble and store the original lock components for future use.
- Install the Smart Lock: Align and secure all components, connect wiring, and test the lock before finalizing.
- Set Up the App: Pair the lock with your smartphone to enable remote control and advanced features.
If you face issues like misalignment, pairing failures, or compatibility problems, professional locksmiths can help. For those in Pittsburgh, PA, Sherlock’s Locksmith offers 24/7 support and expert installation services.
Installing a Smart Lock – Tech Tips from Best Buy

Checking Smart Lock Compatibility
Before buying a smart lock, make sure it’s compatible with your door to avoid installation headaches. Not every smart lock works with every door setup, and picking the wrong one could mean drilling new holes, replacing hardware, or realizing your door just won’t work with the lock you’ve chosen.
Types of Smart Locks
Smart locks come in two main types:
- Retrofit conversion kits: These are great for upgrading an existing deadbolt without replacing everything. They swap out only the interior part of your deadbolt, keeping the exterior keyhole and hardware intact. Popular models like the August Smart Lock and Wyze Lock Bolt are designed to work with many standard deadbolts.
- Full deadbolt replacements: These replace the entire lock, inside and out. They often include features like keypads, fingerprint scanners, or integrated handles. If you’re ready to ditch physical keys or want advanced access options, this might be the way to go.
Once you’ve chosen a type, make sure your door’s dimensions meet the lock’s requirements.
Compatibility Requirements
Your door’s measurements are critical to ensuring a proper fit for your smart lock. Start by checking the door thickness – most smart locks are designed for doors between 1⅜ inches and 1¾ inches thick. Some models, especially those for Euro cylinders, can handle thicker doors, supporting a range from 30 to 70 mm (up to approximately 2¾ inches).
Next, measure the backset, which is the distance from the door’s edge to the center of the deadbolt hole. Standard backsets are usually 2⅜ inches or 2¾ inches. Also, confirm that the bore holes on your door match standard sizes: the cross bore (the large hole for the deadbolt) should be about 2⅛ inches in diameter, and the latch bore (the smaller side hole) is typically 1 inch.
If your deadbolt is installed above a door handle, check for at least 5½ inches of clearance between the center of the deadbolt hole and the center of the handle below it.
Identifying Your Current Deadbolt
Knowing the brand and model of your current deadbolt can make finding a compatible smart lock much easier, especially for retrofit options. Check for manufacturer markings on the interior or exterior of your lock – common brands in the U.S. include Kwikset, Schlage, Yale, and Weiser.
Look for details on the thumb turn or key cylinder. Retrofit smart locks generally work best with single-cylinder deadbolts, while double-cylinder models are rarely compatible. If you’re unsure, take photos of the markings for reference when shopping.
Still can’t identify your deadbolt? Removing the interior thumb turn might reveal more details. If questions remain, consider consulting a professional. For instance, Sherlock’s Locksmith in Pittsburgh, PA, offers expert evaluations and can recommend smart locks that will work with your setup.
Tools and Materials Needed
Having the right tools on hand can make installing a smart lock a much smoother process. While many installations require only basic household tools, some setups might call for specialized equipment.
Required Tools
The Phillips head screwdriver will likely be your go-to tool for removing your current deadbolt and attaching the components of your new smart lock. You might also need a flathead screwdriver for certain parts of the disassembly.
To ensure everything lines up properly, grab a tape measure and a level. If the new smart lock requires different hole sizes than your existing deadbolt, you’ll need a drill along with a door lock installation kit. These kits typically include standard-size hole saws (like 1 inch and 2⅛ inches) and a drill guide or jig to keep your holes centered. When choosing a kit, consider both your budget and compatibility with your tools. Also, make sure the hole saws are suitable for your door material – wood doors are common, but metal doors might need specialized cutting tools. The drill guide is particularly helpful for keeping your drill bit steady and aligned with the door frame.
Once your tools are ready, move on to checking the components included in your smart lock kit.
Smart Lock Components
Before starting, confirm that all the necessary parts are included in your smart lock kit. Most kits come with mounting plates to secure the interior and exterior pieces of the lock, adapters to connect the new mechanism to your existing deadbolt, and batteries to power the electronic parts. Many smart locks use four AA batteries, though this may vary depending on the model.
Having everything laid out and accounted for will save you time and frustration during installation.
Smartphone or Tablet Setup
Your smartphone or tablet will play a key role in the final steps of the installation. Be sure to download the official app for your smart lock ahead of time. This will give you a chance to familiarize yourself with its features and ensure your device is ready to go. A stable internet connection is important, as your device will connect to the smart lock via Bluetooth or Wi-Fi during setup. This connection handles tasks like calibrating the motor and setting up user access codes and schedules.
With your tools, components, and device ready, you’re all set to begin the installation process.
Removing the Old Deadbolt
Taking out your existing deadbolt is the first step before installing your new smart lock. This requires working on both the interior and exterior sides of your door, so make sure you have your tools handy.
Step-by-Step Removal Process
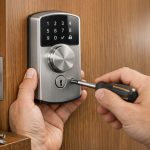
Start by opening the door to give yourself clear access to both sides. On the interior side, locate the faceplate (sometimes called the rose plate), which is held in place by two visible screws. Use a Phillips-head screwdriver to remove these screws.
Once the screws are out, pull or twist the interior faceplate to detach it. After that, move to the exterior side of the door and remove the faceplate on the key side. This may also require a counterclockwise twist to loosen it.
If you don’t see any screws on the faceplates, inspect the bolt or faceplate edges for small holes. These holes often hide set screws that need a long hex wrench. Insert an Allen key into the holes and turn it counterclockwise several times to loosen the screws. Then, use the key to turn the lock cylinder and unscrew the lock assembly.
Next, address the latch assembly – the metal piece on the edge of the door. Locate and remove the two screws (one at the top and one at the bottom) with your Phillips-head screwdriver. Once the screws are out, the latch assembly should slide out easily. The bolt, which extends into the doorframe when locked, is usually attached to this assembly and will come out with it.
If the latch assembly feels stuck, gently pry it out with a flathead screwdriver. Even if the deadbolt is locked, you can still remove it by locating where the bolt connects to the locking mechanism and twisting it open with the screwdriver.
Once everything is removed, make sure to safely store all the components before moving forward.
Storing Removed Components
Place all the removed parts – screws, faceplates, the latch assembly, and other hardware – in a labeled container or bag. Proper labeling will make it easier to identify these parts later if needed. Even though you’re upgrading to a smart lock, it’s a good idea to keep these components in case you decide to reinstall the original deadbolt or run into any compatibility issues.
Store the parts in a dry, safe place where they won’t get lost or damaged. Having these pieces on hand can save you time and money if you need them during or after the installation process.
With the old deadbolt safely removed and stored, you’re ready to begin installing your new smart lock.
Installing the Smart Lock
Now that you’ve removed the old deadbolt and safely set aside its components, it’s time to install your new smart lock. To ensure everything works smoothly, you’ll need to carefully align the parts and make secure connections.
Mounting the Smart Lock
Begin by installing the new deadbolt into the door edge where the old one was removed. Align it with the pre-existing hole in the door for a proper fit. Most deadbolts have markings to indicate the correct orientation, so double-check these before securing it in place.
Next, attach the exterior assembly – this is usually the keypad or reader part of the smart lock – on the outside of the door. Position it vertically and ensure it’s tightly fastened. Pay attention to the alignment during this step for optimal functionality.
Feed the necessary wiring from the exterior assembly through to the interior side of the door. These cables connect the external and internal components, so make sure they pass through cleanly and aren’t pinched or damaged.
Now, install the interior mounting plate. Thread the cables through the designated slot, then level the plate horizontally before securing it with the screws provided.
Connect the interior components by plugging the power cable, door status cable, and Wi-Fi cable into their respective ports on the interior assembly. Insert the tailpiece into the T-shaped slot on the interior assembly, ensuring it fits snugly and engages with the deadbolt mechanism.
Before securing everything, align the thumbturn vertically and confirm the deadbolt latch is retracted. This ensures proper alignment when you attach the interior cover or mechanism to finish the setup.
Finally, power on the lock and check its initial operation.
Installing Batteries and Testing
To complete the physical setup, insert the batteries, ensuring they’re oriented correctly. Reattach the cover securely and test the thumbturn to confirm it operates smoothly without resistance. Keep the door open during this step.
With the door still open, test both manual thumbturn operation and basic electronic functions. This early testing phase helps identify any alignment issues before moving forward with the full setup.
Avoiding Installation Mistakes
To ensure a trouble-free installation, keep these tips in mind:
- Avoid overtightening bolts. Tightening bolts too much can cause misalignment and make the lock feel stiff. If this happens, loosen the bolts slightly and reinstall them without overtightening.
- Use hand tools for adjustments. Hand tools allow for better control, reducing the risk of overtightening or stripping screws.
- Check the strike plate alignment. The deadbolt should align perfectly with the strike plate hole in the door frame. If it doesn’t, adjust the strike plate’s position or gently bend the tab on the bottom of the strike plate using a screwdriver.
- Inspect the weatherstripping. Sometimes, weatherstripping can interfere with the door’s alignment, making it harder for the lock to engage. Ensure it isn’t causing any issues.
- Test with the door closed. Stand inside and manually lock the smart lock without pushing or pulling the door. The lock should engage smoothly. If you need to apply force, there’s likely an alignment problem that needs to be addressed.
sbb-itb-643e28e
Setting Up and Connecting the Smart Lock
After installing and testing your smart lock, the next step is pairing it with your smartphone.
Initial Setup and Pairing
- Start by downloading the lock’s official app from the App Store or Google Play Store. Once installed, create an account if prompted and complete any necessary verification steps.
- Make sure Bluetooth is turned on for your smartphone.
- Open the app and look for the option to add a new device. Follow the instructions in the manual to activate pairing mode on your lock.
- Once the app detects your lock, follow the prompts to finish the pairing process.
Once paired, your smart lock is ready for convenient control through your phone. It’s the final step to bring your lock’s features to life.
Troubleshooting and Professional Help
Even with the most careful installation, unexpected issues can arise. Knowing how to tackle common problems and recognizing when it’s time to call in a professional can save you from unnecessary stress, wasted time, and extra expenses.
Common Installation Problems
One frequent issue is misalignment. If the deadbolt hole doesn’t fit your smart lock’s dimensions perfectly, the lock might feel loose or fail to engage properly. Check the alignment of the strike plate. Sometimes, a slight adjustment to the door frame or filing the strike plate opening can resolve the problem. Avoid forcing the lock, as this could damage both the mechanism and your door.
Pairing failures are another common hurdle, often caused by interference or distance. To fix this, make sure your smartphone is within 3 feet of the lock and temporarily disable nearby Bluetooth devices. If the app still doesn’t detect the lock, try restarting your phone and briefly removing and reinserting the batteries.
Battery installation errors can prevent the lock from powering on entirely. Double-check that the battery polarity matches the markings inside the compartment and ensure all batteries are inserted at the same time.
Door thickness issues may occur if your door falls outside the lock’s supported range, which is typically 1.375 to 1.75 inches thick. For thicker doors, you may need longer screws or professional advice.
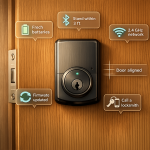
Lastly, WiFi connectivity problems can appear during setup. Most smart locks operate on 2.4GHz networks, so if your router is set to 5GHz, it could cause issues. Ensure your internet connection is stable and that you’re using the correct network password. These troubleshooting tips can help ensure your smart lock integrates smoothly into your home’s security system.
If these steps don’t resolve the issue, it may be time to bring in an expert.
When to Call a Locksmith
If DIY attempts fall short, here’s when professional help becomes essential:
- Structural modifications: If your door frame needs major adjustments, the existing holes don’t align with the new lock, or you find damage while removing the old deadbolt, a locksmith can ensure the job is done properly without compromising security.
- Complex wiring: Some smart locks integrate with alarm systems or require hardwired connections. Electrical work should always be handled by certified professionals to ensure safety and proper functionality.
- Persistent technical problems: If you’re dealing with compatibility issues or suspect a defective lock, a professional can quickly diagnose the problem. They’ll help determine if you need a replacement or a different model altogether.
Professional installation can save you time and ensure everything works as intended.
For homeowners in Pittsburgh, PA, Sherlock’s Locksmith offers expert smart lock installation services. Their 24/7 mobile support means help is always available, even in emergencies. Their certified technicians come equipped with the tools and expertise to handle complex installations, troubleshoot compatibility issues, and integrate your smart lock with existing security systems. Whether you need help with installation or advice on choosing the right lock for your door, professional assistance ensures your home’s security is in capable hands.
Conclusion
Switching from traditional deadbolts to smart locks can significantly improve both home security and everyday convenience. The process typically involves checking your door’s compatibility, gathering the necessary tools, removing the old deadbolt, and installing the new smart lock.
But smart locks offer more than just a way to ditch your keys. They allow real-time monitoring, let you grant temporary access without handing out physical keys, and provide the ability to lock or unlock doors remotely – perfect for when you’re traveling or need to let someone in while you’re away.
Compatibility is a crucial factor during this upgrade. Ensuring your existing door setup aligns with the smart lock can prevent frustrating installation issues. Taking your time, using the right tools, and carefully following each step can help you avoid problems like misaligned components or connectivity glitches. These small efforts make the switch both practical and rewarding.
While many homeowners successfully handle the installation on their own, there are times when professional assistance is the better choice. Complicated setups, structural adjustments, or persistent technical issues often call for expert help to avoid unnecessary hassle or damage.
For those in the Pittsburgh area, Sherlock’s Locksmith provides top-notch smart lock installation services, backed by 24/7 mobile support. Their certified technicians manage everything from compatibility checks to seamless integration with your current security system. Whether you run into unexpected challenges or prefer to leave the job to professionals, their expertise ensures your smart lock works flawlessly – giving you greater security, added convenience, and the confidence that your home’s access is entirely under your control.
FAQs
Why choose a retrofit smart lock conversion kit instead of replacing the entire deadbolt?
Retrofit Smart Lock Conversion Kits: A Simple Upgrade
A retrofit smart lock conversion kit offers an easy and budget-friendly way to modernize your home security. Instead of replacing your entire lock, these kits work seamlessly with your existing deadbolt. This means installation is quick and hassle-free – no drilling, door modifications, or complicated adjustments required. It’s an ideal solution for renters or anyone who prefers to avoid making permanent changes to their doors.
Beyond the straightforward setup, retrofit kits are often lighter on the wallet compared to full lock replacements. Since you’re only upgrading the mechanism and not buying an entirely new system, you can enjoy the convenience of smart lock features while keeping your current hardware intact. It’s a practical choice for those looking to balance functionality with cost.
How can I make sure a smart lock will work with my door before buying it?
To make sure your door is compatible, start by checking its thickness – most doors fall between 1 3/8 and 2 inches. Also, confirm that the door material, whether wood, metal, or another type, can handle the weight and mechanics of a smart lock. Don’t forget to identify the type of lock cylinder your door uses, as most smart locks are specifically designed for standard deadbolts.
For extra reassurance, refer to the installation guide that comes with your smart lock or use the compatibility tools available on the manufacturer’s website. These simple steps can save you from unnecessary hassle and help ensure the installation goes smoothly.
What should I do if my smart lock won’t connect to Wi-Fi during installation?
If your smart lock isn’t connecting to Wi-Fi during setup, a quick restart of both the lock and your Wi-Fi router can often resolve basic connectivity problems. Also, ensure the lock is within the Wi-Fi network’s range and double-check that you’ve entered the correct network name and password.
Still having trouble? Check if your lock’s firmware is up to date and confirm that your router is operating on the 2.4 GHz frequency band, as this is what most smart locks require. You might also try temporarily moving the lock closer to the router or using a Wi-Fi extender to boost the signal. If none of these steps work, refer to the user manual or reach out to the manufacturer for further assistance.


